Groups are collections of plans. They are a way to organize your projects with a basic structure. For example, if you were documenting a University campus, the campus itself would be the project, the individual buildings on campus would be groups and the floors within each building would be plans. Wayfindit allows you to label your project structure with preset common naming conventions or to use a custom solution of your choice.
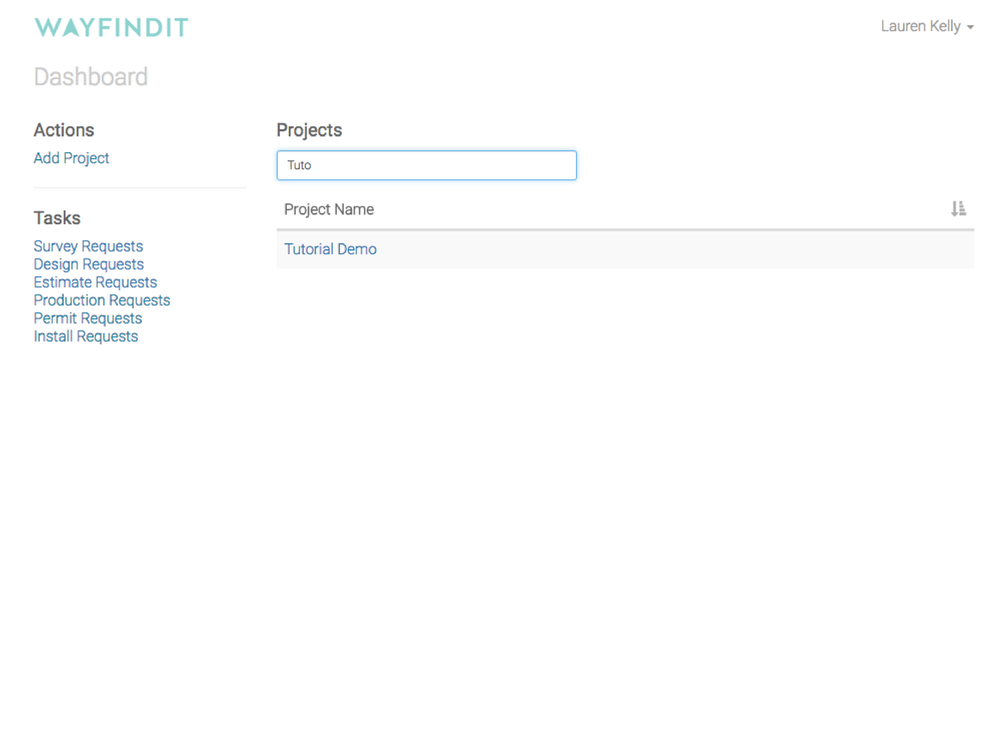
Step 1
Select your project from the dashboard.
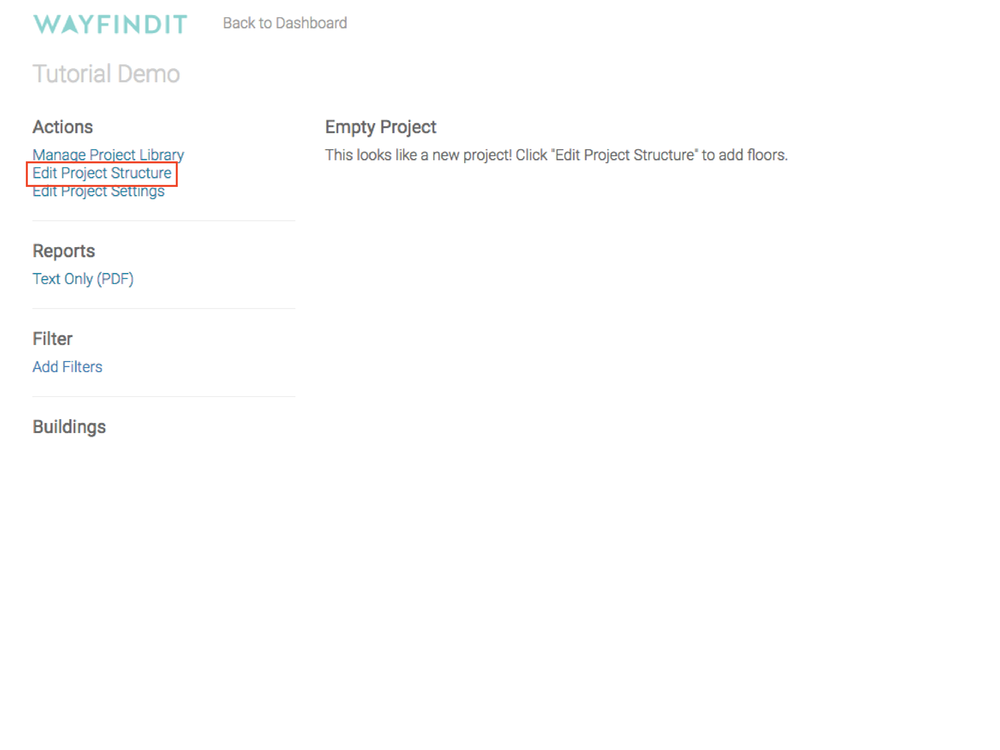
Step 2
Click “Edit Project Structure” link in the left menu.
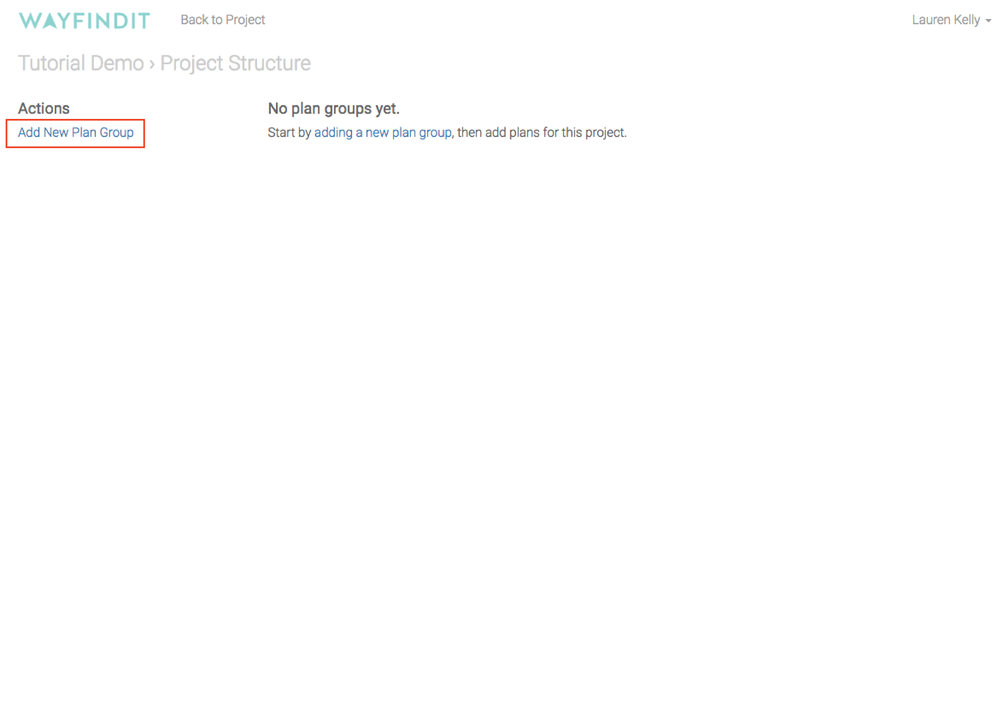
Step 3
Click “Add New Plan Group”.
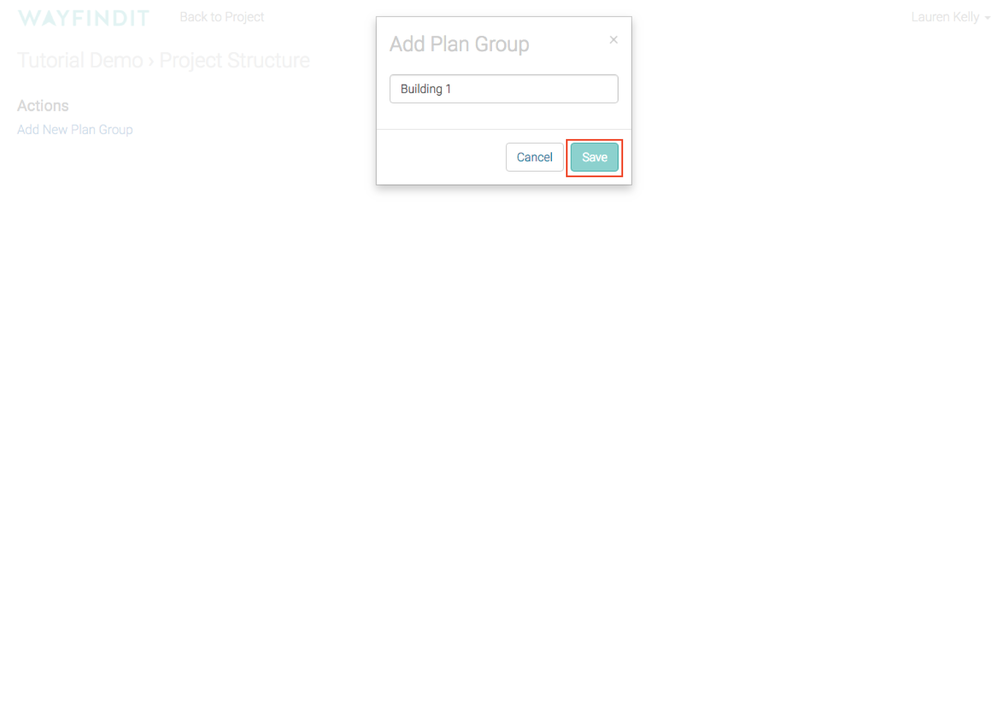
Step 4
Name Your Plan Group and click “Save”.
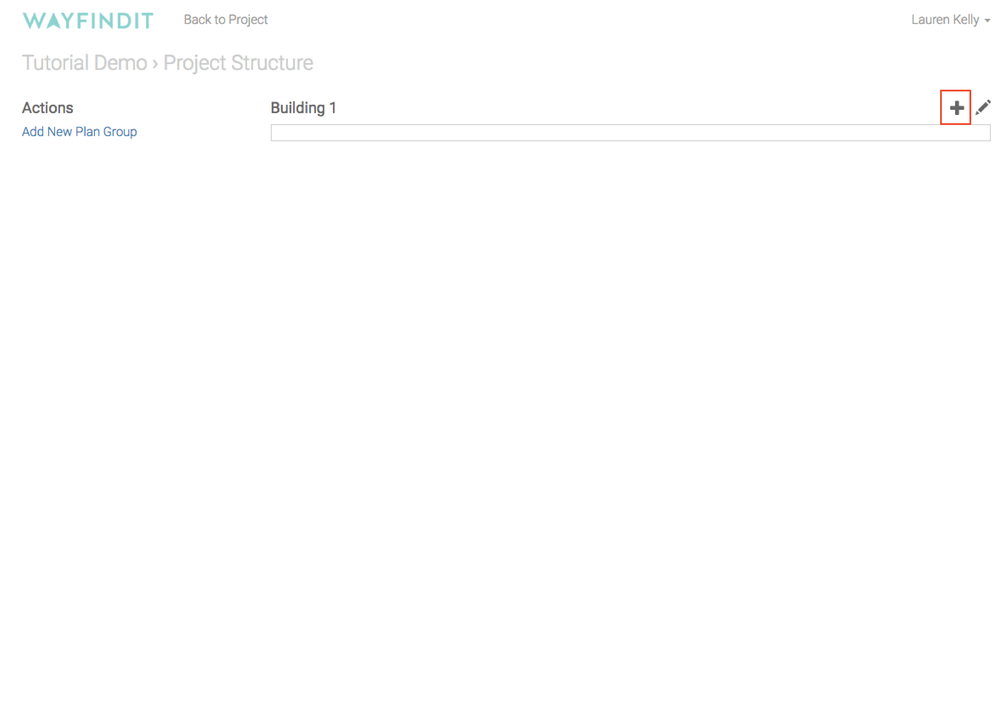
Step 5
After you have clicked “Edit Project Structure” in the left menu (See Step two), click the “+” at the top of your group to add a plan.
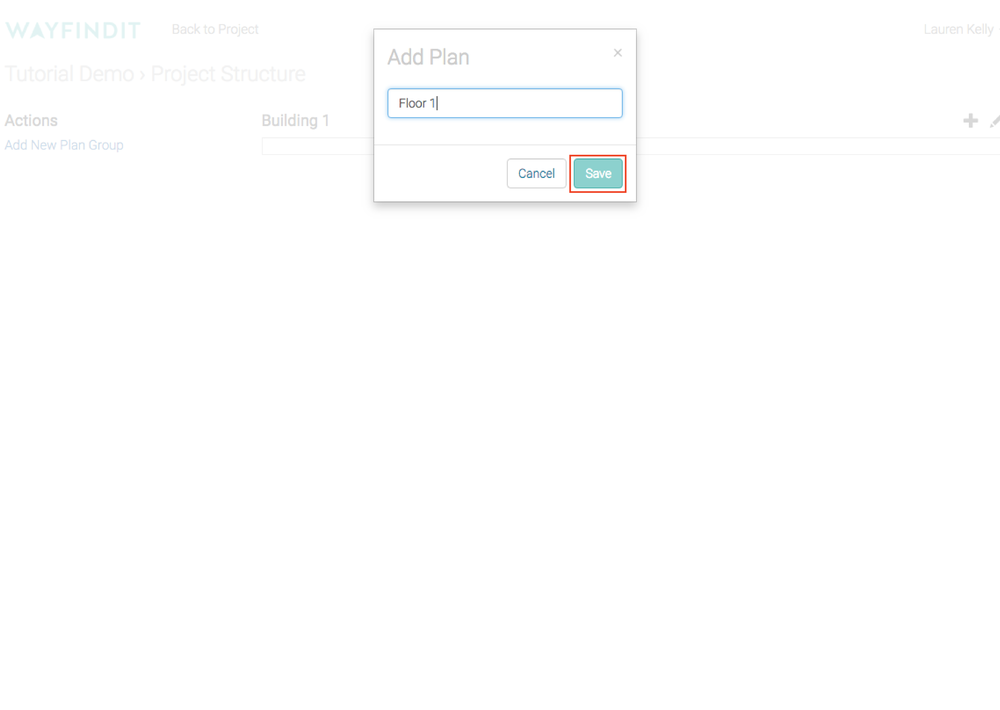
Step 6
Name Your Plan and click “Save”.
Step 7
Your plan has now been saved. The next step is to add your background image. A background image will most likely be a floor plan but could also be something like a satellite photo or any other image that you are documenting on. For more information on adding a background image to a project, see the "Adding Background Image" tutorial.
